 Save
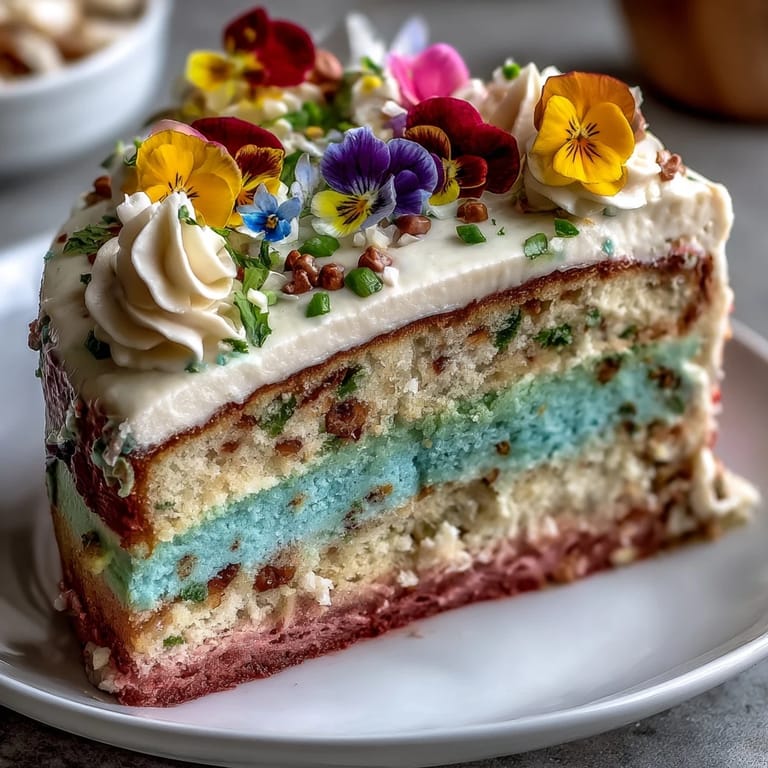
Save The first time pastel ombre cake waltzed through my kitchen, it was a rainy afternoon that promised a glimpse of spring somewhere beyond the windows. As I mixed the batter, little puffs of flour floated up and I couldn't help but marvel at the dreamy palette unfolding in each bowl—pink, yellow, and blue—almost like painting Easter eggs. It was one of those days where the hum of the mixer and the scent of vanilla seemed to lift the gloom, and decorating with edible flowers felt more like a playful art project than baking. Even my usually reserved cat inspected the pans, convinced something magical was up. By the time the cake was layered and crowned, the room felt brighter than it had all week.
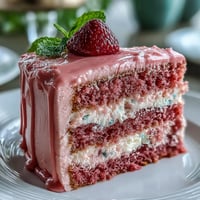
I remember making this cake for my friend Lisa's birthday—her excitement about the colors was contagious. We laughed as we struggled to place edible flowers without eating them first, and when the cake was finally sliced, the layers stole the show. She kept talking about how it was so pretty, she almost wanted to frame a piece instead of eat it. I can't recall a single crumb left on any plate that night. It was a cake that started as a centerpiece and ended as a memory.
Ingredients
- All-purpose flour: Gives structure; I always sift to avoid lumps and achieve a tender crumb.
- Baking powder/baking soda: These are what make the cake rise; double-check they're fresh for that signature fluff.
- Salt: Just a pinch balances the sweetness and enhances flavor throughout the cake.
- Unsalted butter (cake + buttercream): Creamy richness; room temperature is vital for smooth mixing and fluffy texture.
- Granulated sugar: Sweetness and moisture; beating it properly with butter makes all the difference in lightness.
- Eggs: Bind and provide structure; cracking them one at a time prevents shells and uneven mix-ins.
- Pure vanilla extract: The aroma and warmth it imparts is irreplaceable—splurge on real vanilla if you can.
- Whole milk: Moisture and tenderness; room temperature ensures the batter stays smooth.
- Gel food coloring: For vibrant pastel hues; gel is best since it won't alter the batter or frosting texture.
- Powdered sugar: Makes buttercream airy; I sift it to avoid any clumps for picture-perfect icing.
- Edible flowers: These truly elevate the look; always make sure they're organic and safe to consume.
Tired of Takeout? 🥡
Get 10 meals you can make faster than delivery arrives. Seriously.
One email. No spam. Unsubscribe anytime.
Instructions
- Prepare the Pans and Oven:
- Let’s preheat the oven to 350°F and line those cake pans with parchment—nothing ruins a pretty cake faster than sticky bottoms!
- Mix Dry Ingredients:
- Whisking flour, baking powder, baking soda, and salt together feels a bit like shaking up spring itself in a bowl; get them well combined for even layers.
- Cream Butter and Sugar:
- Set the mixer to medium and watch the butter and sugar fluff up; it should feel silky and almost cloud-like after a few minutes.
- Add Eggs and Vanilla:
- Crack in the eggs one by one, mixing gently so the batter stays light, then pour in vanilla and let the aroma fill the kitchen.
- Combine Wet and Dry:
- Alternate adding flour and milk, starting and ending with flour; don’t overmix, just fold until the streaks disappear.
- Create Ombre Pastel Layers:
- Divide the batter into three bowls and swirl in gel food coloring—just enough for a pastel effect without overwhelming the senses.
- Bake the Cake Layers:
- Pour each colored batter into the pans and bake 25–30 minutes; the kitchen will smell like vanilla and hope. Cool on racks until completely chilled.
- Make the Buttercream:
- Beat the butter until almost glossy, then blend in powdered sugar, vanilla, and milk. Divide the frosting and tint each with a matching pastel shade.
- Assemble and Frost:
- Level the cakes if needed. Stack each layer with buttercream, then apply a crumb coat and chill before you start blending the pastel frosting for that ombre look.
- Add the Floral Topper:
- Arrange edible flowers on top like a floral garden, right before serving. This step feels like finishing a painting.
 Save
Save One spring, we served this cake at a picnic where the wind threatened to scatter the edible flowers before anyone could appreciate them. Everyone held their breath as I carefully placed the last blossom on top, and the cake became the star of the dessert table. It’s funny how a floral-frosted cake can lead to spontaneous compliments from strangers passing by. That picnic ended with photos and laughter, the pastel ombre cake making it into nearly all of them. Food really can turn a simple day into a keepsake.
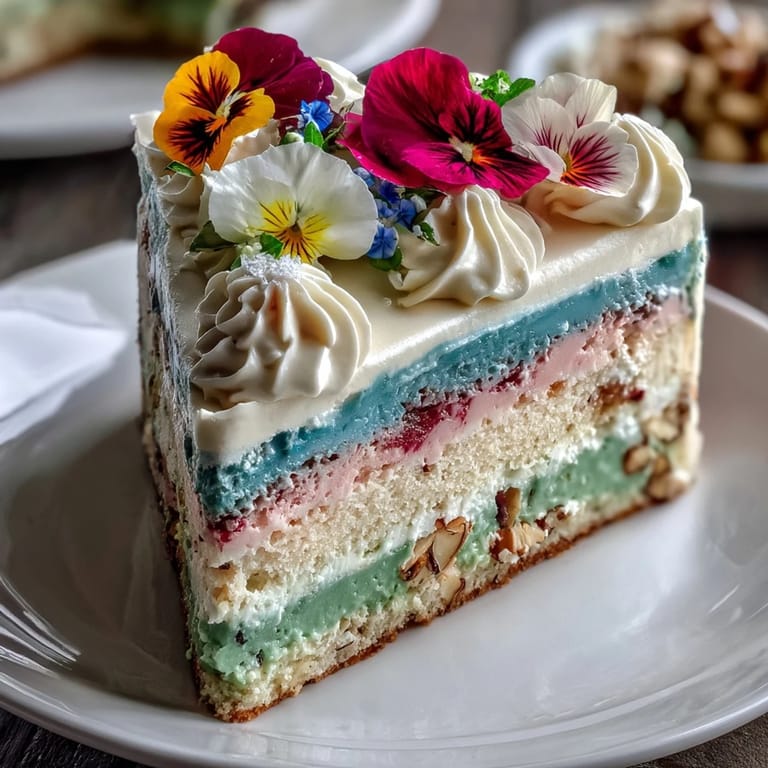
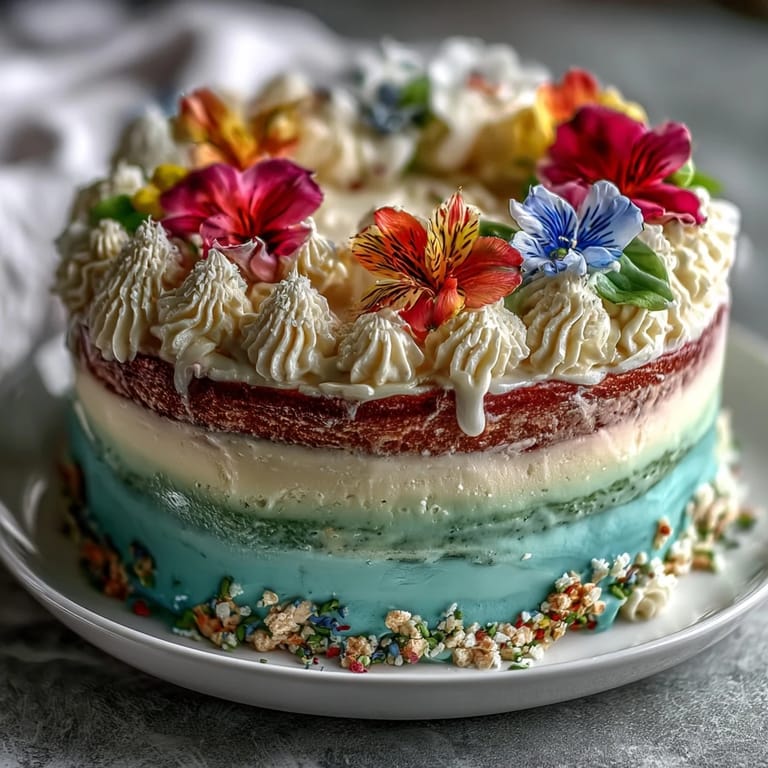
Choosing Your Flower Palette
The first time I picked edible flowers for the cake, I discovered that pansies and violas hold up best—they don’t wilt fast and their colors stay vivid. A mix of bold and soft petals gives the topper a layered look rather than a clump. Getting flowers from reliable sources is key; homegrown is wonderful if you know what’s safe, but markets with organic, edible selections are your friend. Even when the cake is finished, the scent from the flowers adds to the springtime feel in the kitchen.
Mastering the Ombre Frosting
Blending pastel shades for a smooth ombre effect takes patience and a gentle touch. I found that working with chilled layers and applying thin coats helps the colors merge beautifully. An offset spatula is like a paintbrush here—swipe and swirl with intention rather than just smearing. Don’t be afraid to adjust shades as you go, adding extra white buttercream to soften any bold color. Practice makes perfect, and by the second attempt, your cake will glow with confidence.
Spring Celebration Success
Timing the floral topper placement just before serving keeps the flowers fresh and prevents any wilting. The cake always draws people over, so having a sharp knife and plates ready helps the party move smoothly. If you’re serving outside, check the wind or sun—shade keeps those pastel colors and petals looking their best.
- Bring cake out only when you’re ready to slice, so it stays picture-perfect.
- If you run out of edible flowers, fresh herbs like mint or lemon balm look lovely as backup.
- Don’t rush—building the ombre effect is worth every slow, steady swirl.
 Save
Save May your pastel ombre cake bring joy and beauty wherever it’s shared. Every slice carries a little bit of spring, no matter the season.
Recipe Questions
- → How do I achieve the ombre effect in cake layers?
Divide batter evenly and tint each portion with pastel gel food coloring. Layer colored cakes for a gradient look.
- → Can I use any edible flowers for the topper?
Choose organic, food-safe flowers like pansies, violas, roses, or chamomile. Ensure they're labeled edible and allergy-safe.
- → What tips create vibrant pastel colors?
Use gel food coloring for soft yet vivid hues. Avoid liquid coloring as it can dilute batter or frosting consistency.
- → How should I frost the cake for ombre buttercream?
Divide frosting into sections and tint with pastel shades. Spread and blend gradations across the cake for seamless transitions.
- → Are there vegan substitutions available?
Yes, swap plant-based butter, milk, and egg replacers for a vegan-friendly cake while maintaining texture and flavor.
- → What tools help with assembling and decorating?
Round cake pans, mixers, spatulas, and an optional cake turntable enable precise layering and smooth frosting application.
- → Is this cake suitable for spring celebrations?
Absolutely—its pastel colors and floral design make it an ideal centerpiece for springtime events and festive gatherings.