 Save
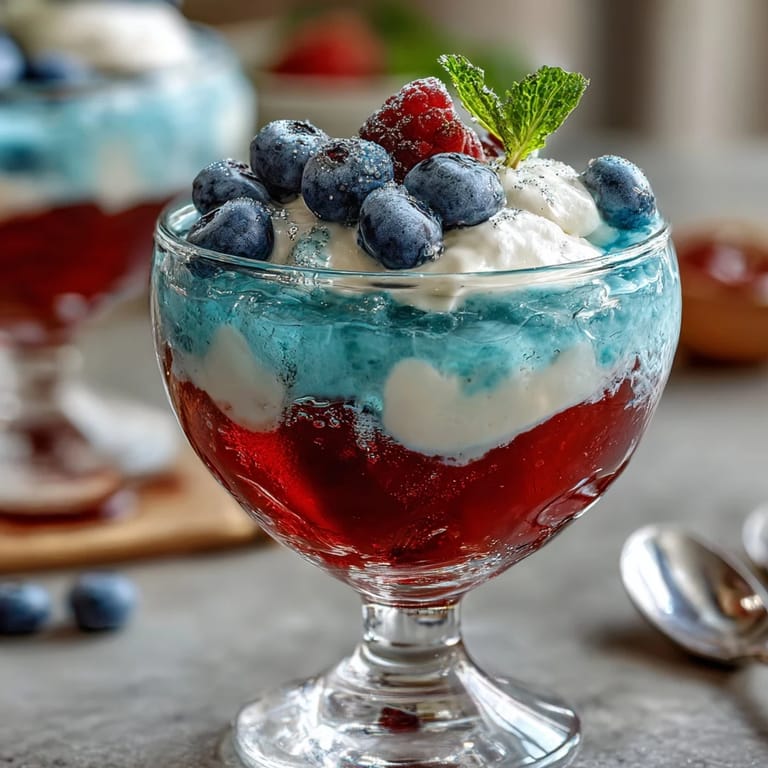
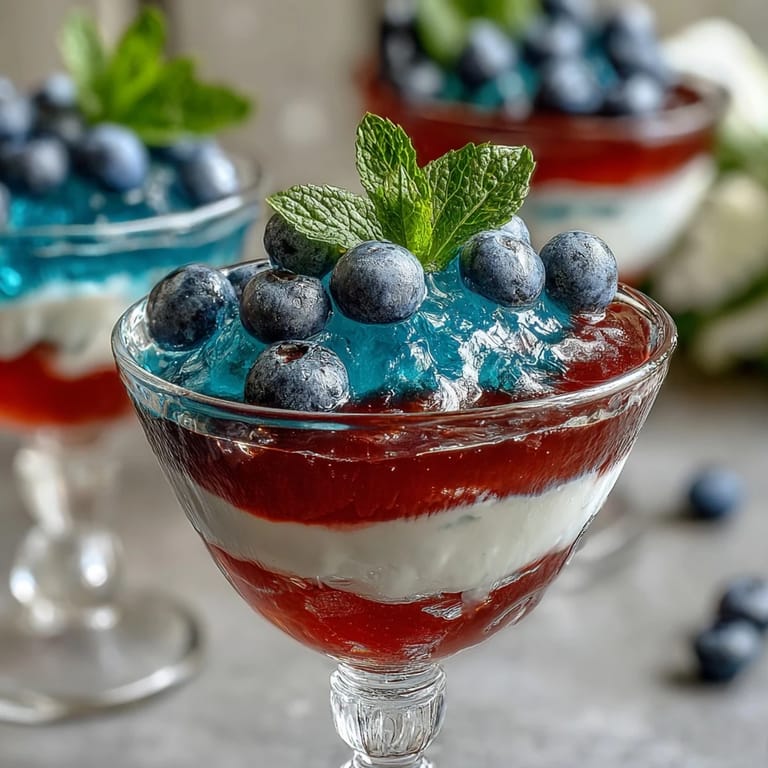
Save My daughter insisted on bringing something red, white, and blue to the Fourth of July potluck, and I was standing in the kitchen at 10 PM the night before, staring at an empty dessert plan. These layered Jello cups came to me like a lightbulb moment, and watching her face when she saw those perfect stripes the next morning made every careful pour worth it. There's something magical about how gelatin transforms from liquid to solid, and even more magical when you nail the layering on the first try. She's now the one making them for her friends' parties, which somehow feels like the best compliment.
I'll never forget my neighbor peeking over the fence while I was testing the angle technique with that muffin tin, asking if I was making some kind of science experiment. By the end of summer, she was angling her own cups and we were laughing about how we'd both discovered this little trick on the same day. Food has a way of sparking these small, unexpected friendships.
Ingredients
- Red Layer Jello (3 oz box, strawberry or cherry): The flavor you choose here sets the whole mood, and strawberry stays a touch more elegant than cherry, though both taste delicious.
- Boiling water for red layer (1 cup): Boiling water fully dissolves the gelatin crystals without any grainy texture hiding in your final dessert.
- Cold water for red layer (1/2 cup): This brings the temperature down just enough so the mixture sets smoothly without overwhelming your white layer later.
- Unflavored gelatin (1 envelope, about 0.25 oz): This is the backbone of your white layer, and blooming it first (letting it sit in cold water) prevents lumps that nobody wants to bite into.
- Cold water for white layer (1/2 cup): Used twice here, once for blooming the gelatin and once mixed into the final layer, so don't skip either step.
- Boiling water for white layer (1/2 cup): This activates the gelatin bloom and creates that silky texture everyone loves.
- Sweetened condensed milk (1 cup): The magic ingredient that makes the white layer creamy and cloud-like, transforming plain gelatin into something that actually feels indulgent.
- Blue Layer Jello (3 oz box, blue raspberry): The finishing touch that tops everything off, and the flavor pairs surprisingly well with the sweetness of that condensed milk layer.
- Boiling water for blue layer (1 cup): Same principle as the red layer—complete dissolution means a smooth, glossy finish.
- Cold water for blue layer (1/2 cup): Cooling it to room temperature prevents the blue from melting into your white layer, which would ruin those crisp stripes you've been nursing along.
- Whipped cream (optional, for garnish): A cloud of whipped cream on top is the cherry on top, or in this case, the patriotic punctuation mark.
- Fresh blueberries and strawberries (optional, for garnish): These add a real fruit moment that makes the whole thing feel less like a party favor and more like something you genuinely care about.
Tired of Takeout? 🥡
Get 10 meals you can make faster than delivery arrives. Seriously.
One email. No spam. Unsubscribe anytime.
Instructions
- Gather your eight clear cups and set them out like you're hosting something important:
- Using clear cups is non-negotiable here because half the appeal is seeing those layers through the glass. Six to eight ounce cups work perfectly, and clear ones from the dollar store work just as well as fancy ones.
- Bloom that red layer into existence:
- Pour your boiling water over the strawberry Jello powder in a bowl and stir for about two minutes until every granule has dissolved completely. The mixture should be clear and glossy, not cloudy, which is your sign the gelatin is fully activated.
- Cool it down and pour gently:
- Stir in the cold water, then divide the mixture into your eight cups, using about two tablespoons per cup. You're aiming for about a quarter-inch layer on the bottom, which sounds precise but honestly just means "not too much."
- Angle those cups and chill like you mean it:
- Nestle each cup into a muffin tin at a slight angle (the tin's shape naturally tilts them) and slide them into the fridge for 45 to 60 minutes until the gelatin is completely set and jiggles only slightly when you shake the cup gently. This angling trick is what creates that elegant slope to your stripes, and skipping it is the difference between "nice" and "restaurant quality."
- Prepare the white layer while you wait:
- Sprinkle your unflavored gelatin over the cold water in a clean bowl and let it sit for five minutes without stirring—this blooming period lets the gelatin absorb the water and prevents lumps from forming later. Add the boiling water and stir slowly until the gelatin completely dissolves, then stir in your sweetened condensed milk until the mixture is smooth and pale.
- Let the white layer cool to room temperature:
- This is the step people skip and then wonder why their white layer melts into the red one. Patience here prevents a frustrating pink muddle, so let it cool for about fifteen to twenty minutes, stirring occasionally.
- Pour the white layer over the set red layer with confidence:
- Once the red layer is fully set, carefully pour the white mixture over it, using about two tablespoons per cup and letting it settle gently. Sit the cups upright now (no more angling) and refrigerate for another 45 to 60 minutes until this layer is firm but still has a slight jiggle.
- Make the blue layer happen:
- Dissolve the blue raspberry Jello in boiling water, stirring for two minutes until completely clear, then stir in the cold water. Let this cool to room temperature as well, stirring occasionally, which takes about fifteen to twenty minutes and gives you time to clean up your jello mess.
- Pour the blue finale:
- Once the white layer is firm, pour the cooled blue Jello gently over the top, using about two tablespoons per cup. Return the cups to the fridge upright for at least two hours, or ideally overnight, until everything is completely set and the layers have formed distinct stripes.
- Finish and serve with flair:
- Just before serving, top each cup with a dollop of whipped cream and scatter a few fresh blueberries and strawberries on top. This final flourish transforms them from fun into actually impressive.
 Save
Save There was a moment at that Fourth of July party when my daughter's friend sat down with one of these cups, took a spoonful of all three layers at once, and got that expression that meant she was having a real food moment. Those are the ones worth remembering, when something homemade stops being just dessert and becomes part of a memory someone carries forward.
The Angling Trick That Changes Everything
The muffin tin technique seems like a small thing, but it's what separates these from looking like something you threw together from a box. When you nestle each cup into the tin's cup shape at an angle, the red layer sets at a slant, creating an optical illusion that makes the stripes look impossibly elegant. I've made these both ways now, and the angled version gets comments every single time.
Troubleshooting the Layers
If your layers are blending together instead of staying distinct, the culprit is almost always temperature. Hot liquid poured onto barely-set gelatin will absolutely melt the layer beneath it, creating a color gradient instead of stripes. The white layer especially needs room-temperature cooled gelatin, since condensed milk can actually help conduct heat if you're not careful.
Making Them Your Own
These cups are endlessly customizable, and once you master the layering technique, you can play with any Jello flavor combinations that speak to you. I've made Christmas versions with red and green, Halloween versions with orange and black, and one experimental purple-pink-white combo that my daughter insisted on calling "cotton candy clouds." The formula stays the same, but the colors are entirely up to your mood and occasion.
- Swap the berry flavors for lime, lemon, or orange Jello if you want a completely different flavor profile.
- For a dairy-free version, use coconut milk or oat milk mixed with a little sugar instead of sweetened condensed milk in that white layer.
- Make these a day or two ahead, since they actually taste better once they've fully set and the flavors have had time to meld.
 Save
Save These Jello cups have somehow become the dessert I make when I want to feel like I've accomplished something without spending all day in the kitchen. They're the kind of simple that feels fancy, which is honestly the best kind of cooking.
Recipe Questions
- → How do I achieve distinct layers without mixing?
Allow each layer to fully set in the refrigerator before adding the next. Chilling at a slight angle for the first layer helps keep layers sharp.
- → Can I substitute dairy condensed milk for a dairy-free option?
Yes, coconut milk and sugar can be used as a dairy-free alternative to sweetened condensed milk for the white layer.
- → What is the best way to chill the layers evenly?
Use clear cups and place them upright in the refrigerator after each layer sets. For angled layers, a muffin tin can help hold cups at a tilt.
- → Can I change the berry flavors in the red and blue layers?
Absolutely, swapping flavors like strawberry with cherry or blue raspberry with other blue fruit flavors is possible to suit your taste.
- → How long does the entire process take?
The active preparation takes about 30 minutes, but the full setting requires around 4 hours and 30 minutes including chilling time.