 Save
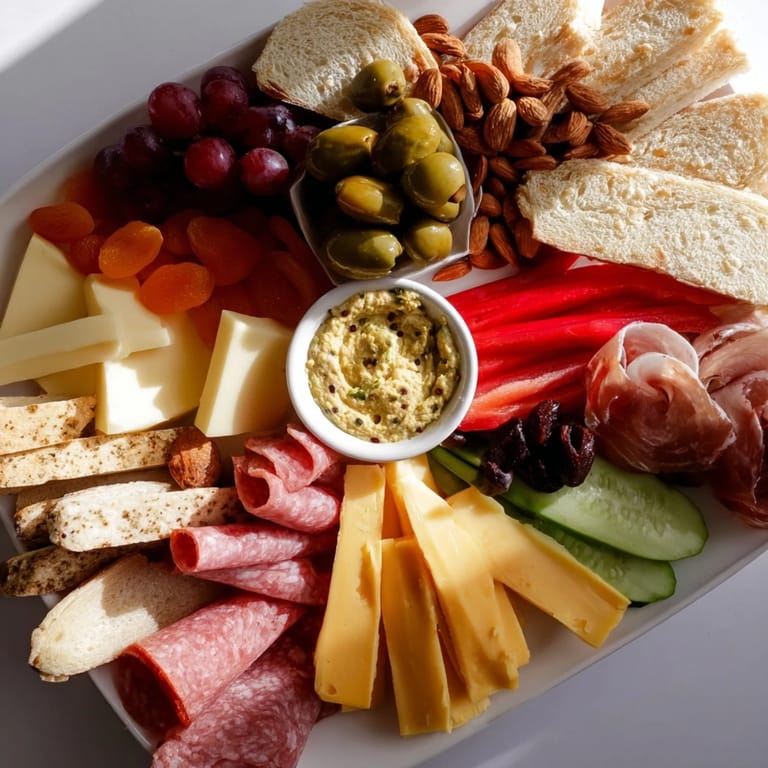
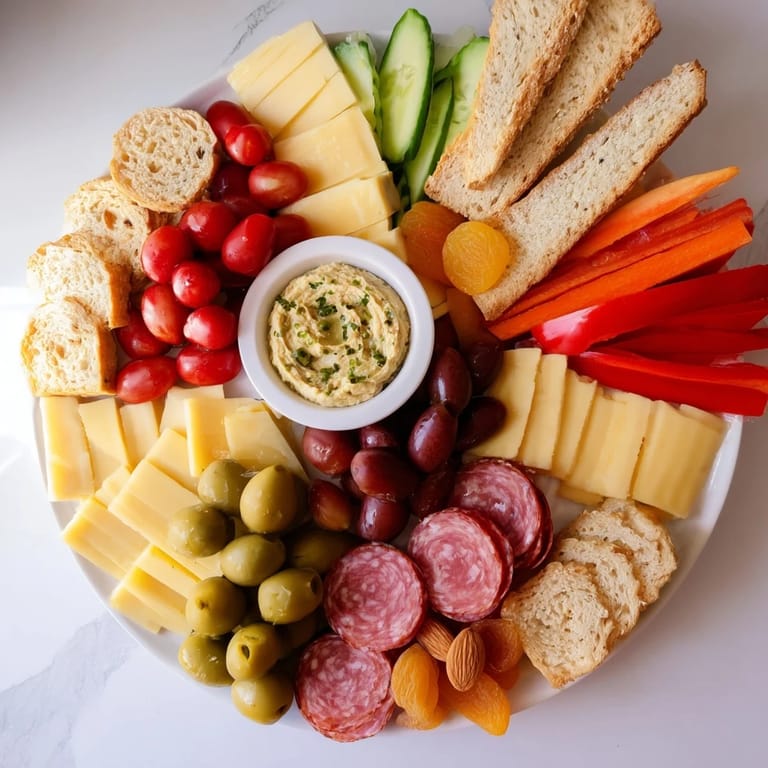
Save I still remember the first time I arranged a charcuterie board with real intention, not just haphazardly placing things on a platter and hoping it looked appetizing. A friend visiting from out of town mentioned she loved boards that told a story, and that's when it clicked for me—why not make the arrangement itself the narrative? That's when I discovered the magic of the arrowhead board. Every element pointing inward created this wonderful sense of purpose, like everything on that board was moving toward something worth tasting. Now whenever I make one, guests immediately notice the intentional design before they even reach for a bite.
I made this board last summer for my sister's birthday gathering, and watching people lean in to see how every angle was deliberate—how the cheese wedges pointed like little arrows, how even the olives were scattered along invisible lines—it transformed a simple appetizer into something that felt almost artistic. That's when I knew this wasn't just about feeding people. It was about creating a moment where food and presentation became inseparable.
Ingredients
- Aged cheddar, cut into triangles (100 g): The sharp, crystalline bite grounds the board and cuts through richer elements. Cut at consistent angles so they all point the same direction—consistency is what makes the arrow work.
- Brie, sliced into wedges (100 g): The creamy counterbalance that melts on crackers. Slice it thick enough that wedges hold their shape but thin enough to actually spread.
- Gouda, cut into strips (100 g): Those caramel-sweet notes bridge the gap between sharp and mild. Strips are easier to angle than blocks.
- Prosciutto, folded (100 g): Fold it loosely—tight folds look stingy, loose folds look generous and inviting.
- Salami, sliced and folded (100 g): The paprika-rich flavor everyone reaches for. Fold the slices in half or quarters to create natural directional shapes.
- Seedless grapes in small clusters (1 cup): Keep them in little bunches rather than individual grapes—they look fuller and cluster better toward the dip.
- Cherry tomatoes, halved (1 cup): Halving them creates little pools of juice and makes them easier to position flat on the board.
- Cucumber, sliced diagonally (1 small): The diagonal cut already suggests direction and catches light beautifully.
- Red bell pepper, sliced into strips (1 small): The brightness matters—it's your visual anchor point besides the dip.
- Artisan crackers (1 cup): Choose ones with interesting shapes. Square crackers are easier to angle than round ones.
- Baguette, sliced on the bias (1 small): The bias cut is crucial—it's already angled and suggests the directional flow you're creating.
- Marcona almonds (½ cup): These are buttery and elegant, way better than regular almonds for a board like this.
- Dried apricots (¼ cup): They add sweetness and those little pops of color that guide the eye along your directional lines.
- Olives (¼ cup): Scatter them along your invisible flow lines—they're like punctuation marks in a sentence.
- Herbed hummus or whipped feta dip (100 ml): This is your focal point, your arrow's target. Use a small, beautiful bowl and nestle it firmly so it doesn't shift.
Tired of Takeout? 🥡
Get 10 meals you can make faster than delivery arrives. Seriously.
One email. No spam. Unsubscribe anytime.
Instructions
- Set your anchor—place the dip bowl first:
- Find the end or corner of your board that feels like the natural focal point. The dip bowl is your arrow's tip. Set it down firmly and step back. This moment matters because everything else radiates from here.
- Create the cheese foundation:
- Start arranging your cheese wedges and triangles in a fanning pattern, all their points facing toward that dip bowl. Imagine you're drawing lines with cheese. The aged cheddar triangles are sharp enough to read as directional—use those first. Layer in the brie wedges next, then the gouda strips. There should be a clear sense that if you drew a line from each piece through its center, all those lines would meet at the dip bowl.
- Guide with the meats:
- Now fold your prosciutto and salami, positioning the folds along those same invisible lines pointing toward the dip. The folds are natural directional markers. Don't scatter them randomly—think about how they reinforce the arrow's trajectory. The folded edges can point right at the dip bowl.
- Layer in vegetables and fruit with intention:
- Your grape clusters and tomato halves go next. Place them so they follow the same directional pattern. Diagonal cucumber slices already suggest movement—align that movement toward your focal point. The red pepper strips are straight lines—those are powerful directional tools, so angle them carefully.
- Place crackers and bread as radiating guides:
- Crackers and bread slices are your larger shapes. Arrange them in little grouped lines, each line pointing at the dip. Those biased-cut baguette slices? They're already angled—let that angle work for you. Crackers should fan outward, all oriented the same directional way.
- Scatter the small treasures along your lines:
- Marcona almonds, dried apricots, and olives fill the gaps and reinforce your pattern. Don't just drop them randomly. Tuck them into the spaces between larger components, and let them follow the same directional logic. They're like breadcrumbs leading back to the dip.
- Step back and adjust until it feels alive:
- This is the honest part—stand back and look at your board from above. Does it feel like everything is pointing somewhere? Are there awkward gaps that break the flow? Adjust. Move a cheese wedge half an inch. Rotate a cracker cluster. This isn't rigid—it's about balance and visual flow feeling natural, not forced.
 Save
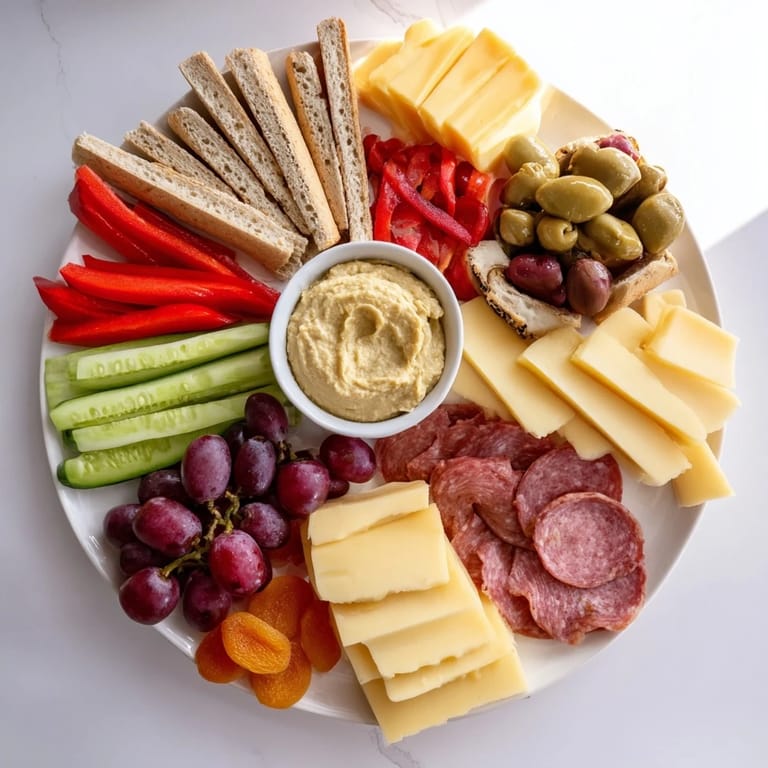
Save There was this moment during that summer gathering when my sister's friend—who claimed she didn't care about aesthetics, only taste—stopped mid-conversation just to really look at the board. She smiled and said, 'This is almost too pretty to eat.' Almost. She ate plenty. But that moment, where presentation added something intangible to the experience, where it made people feel cared for before they'd even tasted anything—that's when I understood the real power of intention in the kitchen.
Choosing Your Dip Wisely
The dip is the beating heart of this whole arrangement, so treat it that way. Herbed hummus is classic and everyone eats it, but don't let that be your default. Consider who's coming and what flavors will make them feel welcomed. Whipped feta with lemon and dill is elegant and a little unexpected. Beet hummus adds this gorgeous magenta pop that photographs beautifully. Tzatziki if you want something cool and cucumber-forward. Whipped ricotta if you're leaning toward sweetness and want to pair it with dried fruit. The dip isn't an afterthought—it's the thing all your careful arrangement is pointing toward. Make it something worth pointing at.
The Secret Language of Angles
There's something almost architectural about understanding how angle creates movement in food design. When you slice a baguette on the bias instead of straight across, you're not just being fancy—you're creating an arrow that your eye naturally wants to follow. Diagonal vegetable slices do the same thing. Even the way you fold a piece of prosciutto creates a natural pointer. Once you see boards this way, you can't unsee it. You start noticing how every cut and fold either creates movement or disrupts it. That awareness changes how you approach any board you make from that point forward.
Building for Your Crowd
The beauty of this board is its flexibility without losing its personality. If half your guests are vegetarian, the board doesn't need a meat section and a plant section that looks separate—just build the arrow with what works for everyone. The cheese, fruit, vegetables, and nuts create a complete, satisfying board on their own. If you're serving wine, remember that the board itself should complement those flavors, not compete. A crisp Sauvignon Blanc wants to cut through richness, so your sharp cheddar becomes even more brilliant next to it. A lighter Pinot Noir plays beautifully with earthy notes from nuts and mushroom crackers if you have them. Think about color variety too—the more colors you have naturally arranged by your directional pattern, the more visually striking it becomes.
- A wooden board in natural finish feels warmer than slate, while slate looks more dramatic and modern—choose based on the mood you want
- Prep everything at least an hour before guests arrive so you're not rushing the arrangement; it deserves your full attention and steady hands
- Use small cheese knives right on the board so people know which tools go with which cheeses—it's a small thoughtfulness that registers
 Save
Save Making a charcuterie board is one of those rare kitchen skills where you get better simply by paying attention and caring about the experience you're creating. This arrowhead design isn't just pretty—it actually makes the eating experience better by guiding people and creating conversation. That's kitchen magic.
Recipe Questions
- → How should the components be arranged on the board?
All elements such as cheeses, meats, vegetables, crackers, and nuts should be angled so their points or lines direct toward the central dip bowl to create a unified visual flow.
- → Can this board be adapted for vegetarian guests?
Yes, simply omit the meats and increase the variety of cheeses or fresh vegetables to maintain balance and flavor diversity.
- → What dips work well for this board?
Herbed hummus, whipped feta, beet hummus, tzatziki, or whipped ricotta are great choices that complement the board's flavors.
- → What are good beverage pairings?
A crisp Sauvignon Blanc or a light Pinot Noir pairs nicely with the combination of savory cheeses, meats, and fresh produce.
- → How to maintain visual interest on the board?
Use contrasting colors and textures, such as bright reds, greens, soft cheeses, and crunchy nuts, arranged thoughtfully to enhance the dynamic arrowhead pattern.