 Save
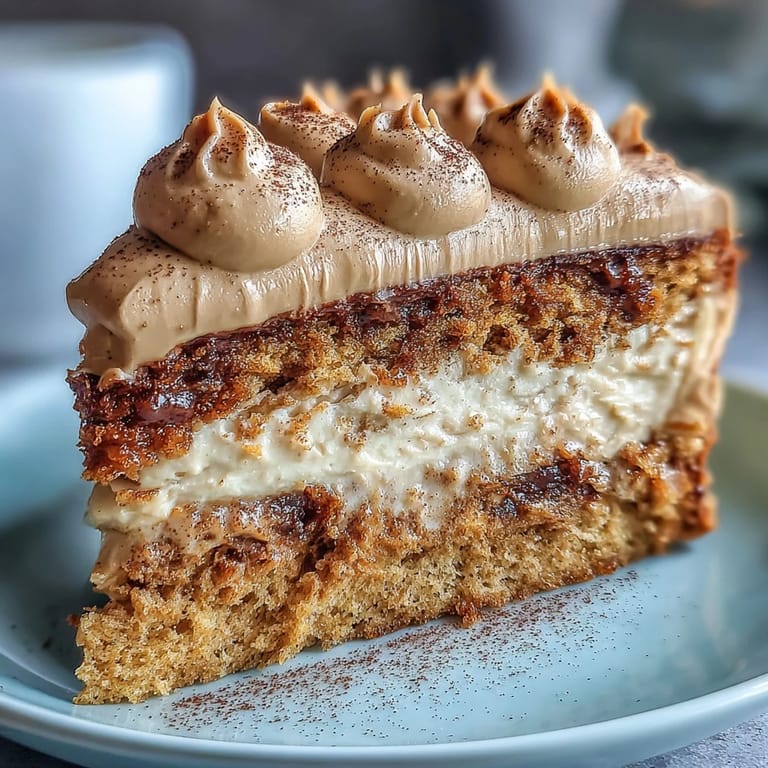
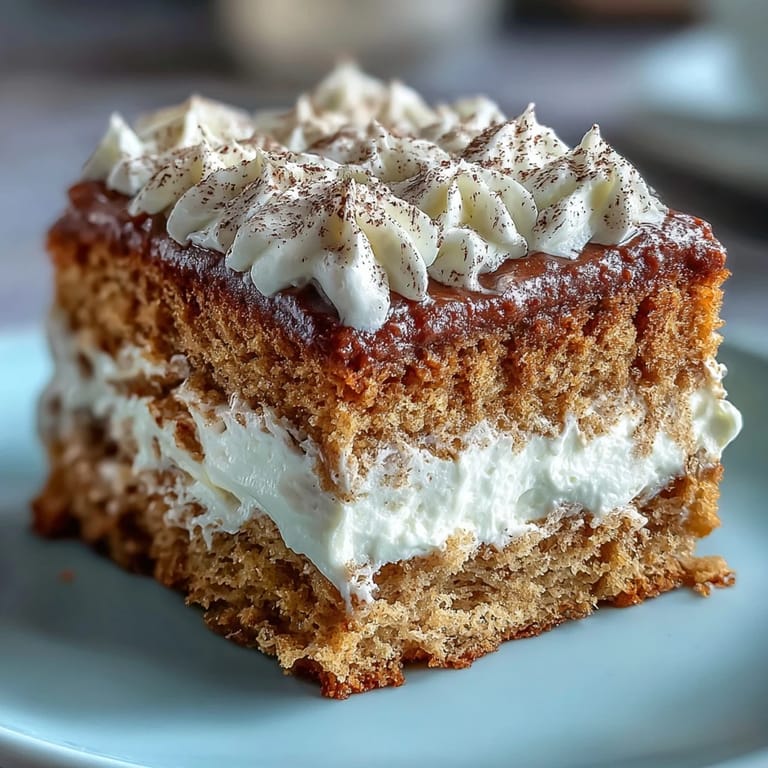
Save My friend Yuki brought hojicha cake to a quiet Sunday afternoon, and the smell that filled my kitchen was unlike anything I'd encountered before—toasty, almost nutty, with this delicate floral undertone that made me lean in closer. She explained it was a childhood favorite from Kyoto, made by her grandmother, and watching her describe those memories made me desperate to learn how to make it myself. The first time I succeeded, my kitchen filled with that same enchanting aroma, and I understood why this cake had traveled across an ocean in her heart.
I made this for my coworker's birthday, and the moment people tasted it, they went quiet—not out of politeness, but because they were actually tasting something they'd never experienced before. Someone asked if it was chocolate, another person swore they tasted caramel, and my boss looked genuinely puzzled in the best way possible. That's when I realized this cake does something special: it makes people curious about flavors they didn't know existed.
Ingredients
- Eggs, room temperature: Cold eggs won't whip properly and you'll lose that crucial volume that makes the cake fluffy, so let them sit on the counter for at least 30 minutes.
- Granulated sugar: This dissolves into the egg mixture during the warm whisking stage, creating a stable foam that holds the cake's structure.
- Cake flour, sifted: The fine texture of cake flour keeps this sponge delicate instead of tough, and sifting it twice prevents lumps that can ruin the crumb.
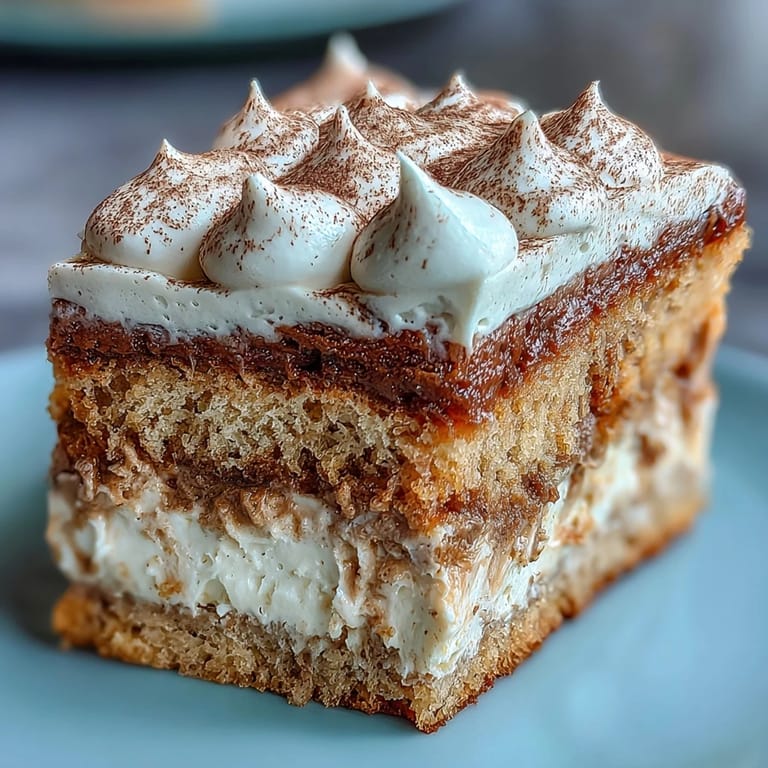
- Hojicha powder: This is roasted green tea and it's the soul of the cake—find it at Japanese grocery stores or order online, and don't substitute with regular matcha or it'll be completely different.
- Unsalted butter, melted and cooled: Melting it first prevents clumping when it hits the batter, and cooling it means you won't deflate all that air you worked so hard to create.
- Whole milk, room temperature: This tempering mixture with the butter prevents both ingredients from sinking to the bottom and helps bind everything together smoothly.
- Fine sea salt: A tiny pinch heightens the hojicha flavor and balances the sweetness so the cake doesn't taste one-dimensional.
- Heavy cream, minimum 35% fat: Higher fat content whips to stiffer peaks and stays stable longer, which matters when you're layering and chilling the cake.
- Powdered sugar: Sift this before adding to cream so you avoid lumps that would ruin the silky texture.
- Vanilla extract: A small amount adds depth without overpowering the delicate hojicha flavor.
Tired of Takeout? 🥡
Get 10 meals you can make faster than delivery arrives. Seriously.
One email. No spam. Unsubscribe anytime.
Instructions
- Set up and preheat:
- Preheat your oven to 170°C and line only the bottom of your pan with parchment—ungreased sides help the cake climb upward as it bakes. This temperature is gentler than standard cakes, so the delicate sponge bakes evenly without browning too fast.
- Warm the eggs and sugar:
- Place your room-temperature eggs and sugar in a heatproof bowl over simmering water, whisking constantly until the mixture feels warm (around 40°C). This warmth helps the eggs whip to their maximum volume and creates a more stable foam.
- Whip to fluffy clouds:
- Remove from heat and beat on high speed until the mixture is pale, thick, and has tripled in volume—this takes about 7 minutes and you'll know it's done when you lift the beaters and the batter falls in thick ribbons. Beat for one more minute at reduced speed to stabilize the foam without breaking it down.
- Fold in the dry ingredients:
- Sift your cake flour, hojicha powder, and salt together, then fold them into the egg mixture in two additions using a rubber spatula. Fold gently and deliberately—overmixing deflates all that air you just created, and undermixing leaves flour pockets.
- Add the butter mixture:
- Combine your cooled melted butter with milk in a small bowl, then stir in a scoop of cake batter to temper it. Fold this mixture back into the main batter slowly so the butter distributes evenly without creating dense streaks.
- Bake the sponge:
- Pour into your prepared pan and tap gently to release large air bubbles, then bake for 23 to 25 minutes until the top springs back when lightly touched and a skewer comes out clean. The cake should smell toasty and fragrant, not burnt.
- Cool with patience:
- Let the cake sit in the pan for 10 minutes—this allows it to set slightly so it won't fall apart. Then run a thin knife around the edges, invert onto a cooling rack, and peel away the parchment while it's still slightly warm.
- Make the hojicha cream:
- In a chilled bowl, sift your hojicha powder and powdered sugar together to avoid lumps, add heavy cream and vanilla, then whip to medium-stiff peaks. Don't overbeat or you'll end up with butter instead of cream.
- Layer and chill:
- Once the cake is completely cool, slice it horizontally into two or three layers, then spread hojicha whipped cream between each layer and over the top. Chill for at least 30 minutes—this firms up the cream so you'll get clean slices instead of a crumbly mess.
 Save
Save My neighbor tasted a slice and immediately asked for the recipe, then mentioned she'd been missing the tea cakes from her childhood in Japan. Making that cake for her felt like I was helping her access a memory she thought was lost, and that's the real magic of this dessert.
The Hojicha Story
Hojicha is roasted green tea, and that roasting process is what gives it this warm, almost coffee-like depth that's so different from fresh matcha. The roasting removes some of the caffeine and bitterness, leaving behind something gentler and more complex—it's like the difference between morning coffee and an evening wind-down cup. Understanding what hojicha actually is makes you respect why it works so well in this cake instead of overpowering it.
The Genoise Technique
A genoise sponge is one of the most elegant cake structures because it relies entirely on whipped eggs for its lift—no baking soda, no baking powder, just pure air. This means every step matters because you're essentially trying to trap as much air as possible in the batter and then bake it without deflating it. My first attempt failed because I got impatient with the folding process, but learning to fold gently and deliberately transformed everything after that.
Making It Your Own
While the classic version is stunning on its own, this cake welcomes gentle additions once you've mastered the base. Before layering, you can brush each cake layer lightly with cooled hojicha tea or a simple sugar syrup to add moisture, and decorating with chocolate shavings, toasted nuts, or an extra dust of hojicha powder on top adds textural interest.
- Brush each layer with hojicha tea before adding cream for extra moisture and flavor intensity.
- Roasted hazelnuts or toasted sesame seeds add crunch and complexity to the layers.
- Chill the assembled cake overnight—flavors deepen and it slices even cleaner the next day.
 Save
Save This cake has become my go-to when I want to make something that feels special and a little bit outside the everyday. Watching someone taste hojicha for the first time through this cake never gets old.
Recipe Questions
- → What makes hojicha different from other Japanese teas?
Hojicha is roasted green tea leaves that develop a deep, earthy flavor with smoky and caramel notes. Unlike matcha, it has lower caffeine and a reddish-brown color from the roasting process, making it perfect for baking.
- → Can I use regular green tea powder instead of hojicha?
Regular green tea powder like matcha will result in a more bitter, grassy flavor profile and vibrant green color. Hojicha's unique roasted, smoky sweetness is essential for the authentic taste of this cake.
- → Why is the egg mixture warmed over simmering water?
Gently warming the eggs and sugar to about 40°C helps create a stable foam that achieves maximum volume when beaten. This technique ensures the genoise sponge remains light and airy.
- → How should I store the assembled cake?
Store the cake in an airtight container in the refrigerator for up to 3 days. The cream layers need to stay chilled, but bring slices to room temperature for 10-15 minutes before serving for the best texture.
- → Can I make the sponge layers in advance?
Yes, bake and cool the sponge completely, then wrap tightly in plastic wrap and freeze for up to 2 weeks. Thaw at room temperature before assembling with fresh whipped cream.