 Save
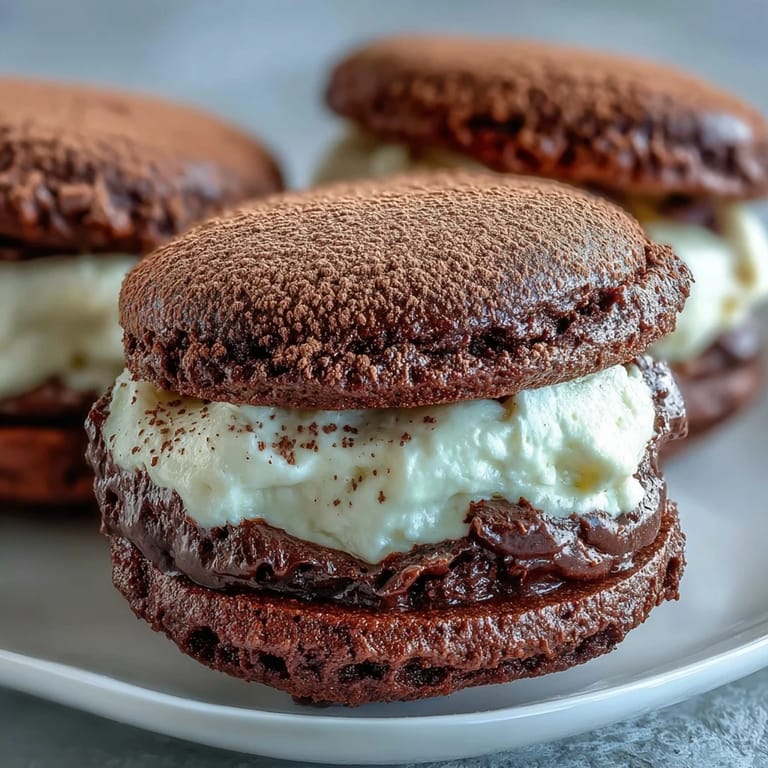
Save My neighbor knocked on my door one Sunday afternoon holding a plate of something that looked like chocolate sandwich cookies but smelled like an Italian café. She called them tiramisu whoopie pies, and I thought she was joking until I bit into one. The soft chocolate cake, the creamy coffee filling, the dusting of cocoa that clung to my fingers—it was like someone had tucked an entire dessert menu into a handheld treat. I asked for the recipe before she even made it back down the hallway.
I made these for a birthday brunch once, and someone asked if I'd ordered them from a bakery. That felt better than any compliment about my actual cake decorating skills. The tray emptied so fast I barely got one for myself, and I spent the rest of the morning fielding texts asking when I'd make them again. Now I double the batch every time, because I've learned that no one stops at just one.
Ingredients
- All-purpose flour: This gives the cakes structure without making them dense, and measuring it correctly makes all the difference in texture.
- Unsweetened cocoa powder: Use a good quality cocoa here because it carries the chocolate flavor, and sifting it prevents lumps in the batter.
- Baking powder and baking soda: Together they create the soft, cakey rise that makes these whoopie pies tender instead of cookie-like.
- Unsalted butter: Softened to room temperature, it creams beautifully with the sugar and keeps the cakes moist for days.
- Granulated sugar: It sweetens the cakes and helps create that light, fluffy crumb when beaten with the butter.
- Egg: Binds everything together and adds richness, so make sure it's at room temperature for better mixing.
- Vanilla extract: A small amount deepens the chocolate flavor and rounds out the sweetness.
- Whole milk: The fat content keeps the cakes soft, and alternating it with the dry ingredients prevents overmixing.
- Mascarpone cheese: The star of the filling, it brings that creamy, tangy richness that makes tiramisu unforgettable.
- Heavy cream: Whipped with the mascarpone, it lightens the filling and gives it that cloud-like texture.
- Powdered sugar: Sweetens the filling without grittiness, and sifting it ensures it blends in smoothly.
- Instant espresso powder: Dissolved in hot water, it delivers a concentrated coffee punch without making the filling watery.
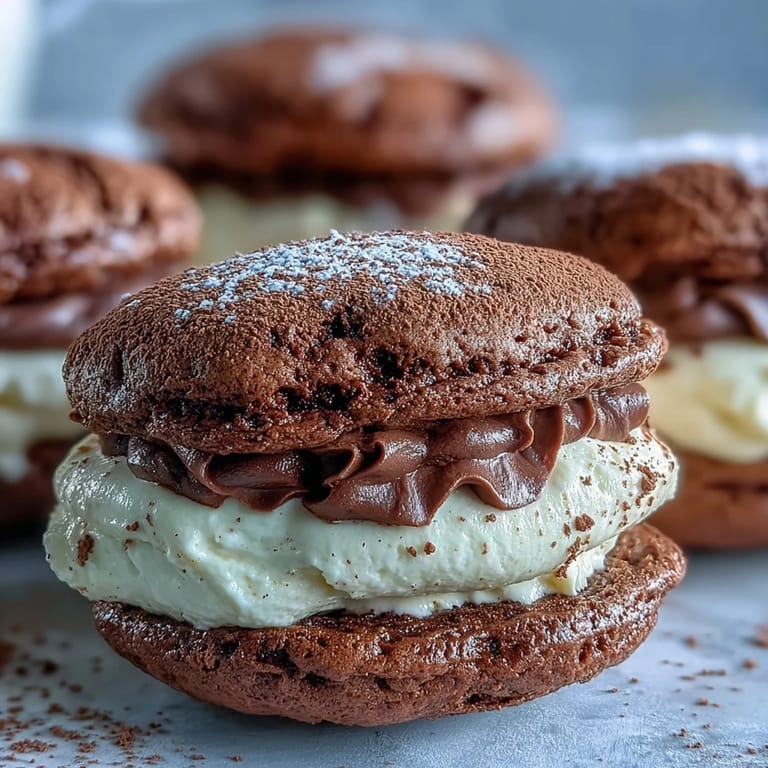
- Cocoa powder for dusting: The final touch that makes them look bakery-perfect and adds a hint of bitterness to balance the sweetness.
Tired of Takeout? 🥡
Get 10 meals you can make faster than delivery arrives. Seriously.
One email. No spam. Unsubscribe anytime.
Instructions
- Prep your oven and pans:
- Set the oven to 350°F and line two baking sheets with parchment paper so the cakes release easily. Give yourself enough counter space because you'll be working with 24 little rounds of batter.
- Mix the dry ingredients:
- Whisk together the flour, cocoa powder, baking powder, baking soda, and salt in a medium bowl until evenly combined. This step prevents clumps and ensures every cake bakes evenly.
- Cream the butter and sugar:
- Beat the softened butter and granulated sugar in a large bowl until the mixture is pale and fluffy, about three minutes. Scrape down the sides so nothing gets left behind.
- Add the egg and vanilla:
- Beat in the egg and vanilla extract until fully incorporated and the batter looks smooth. The mixture might look slightly curdled at first, but it will come together.
- Alternate the dry and wet:
- Add the dry ingredients in three parts, alternating with the milk in two parts, starting and ending with the dry mixture. Mix just until combined so the cakes stay tender.
- Scoop the batter:
- Use a medium cookie scoop or tablespoon to drop 24 mounds onto the prepared baking sheets, spacing them about two inches apart. They'll spread slightly as they bake.
- Bake the cakes:
- Bake for 10 to 12 minutes, until the tops spring back when lightly pressed. Let them cool on the pans for five minutes, then move them to a wire rack to cool completely before filling.
- Make the espresso base:
- Dissolve the instant espresso powder in hot water and let it cool to room temperature. This prevents the filling from melting or separating when you mix it in.
- Whip the filling:
- Beat the chilled mascarpone, cold heavy cream, and sifted powdered sugar until smooth and thick, being careful not to overbeat. Stir in the cooled espresso and vanilla just until combined, then chill for 20 minutes if it's too soft to pipe.
- Assemble the whoopie pies:
- Spread or pipe a generous dollop of filling onto the flat side of half the cooled cakes. Top each with another cake, flat side down, pressing gently to create a sandwich.
- Dust and chill:
- Use a fine sieve to dust the tops with unsweetened cocoa powder for that classic tiramisu look. Refrigerate the assembled pies for 30 minutes to let the filling set before serving.
 Save
Save 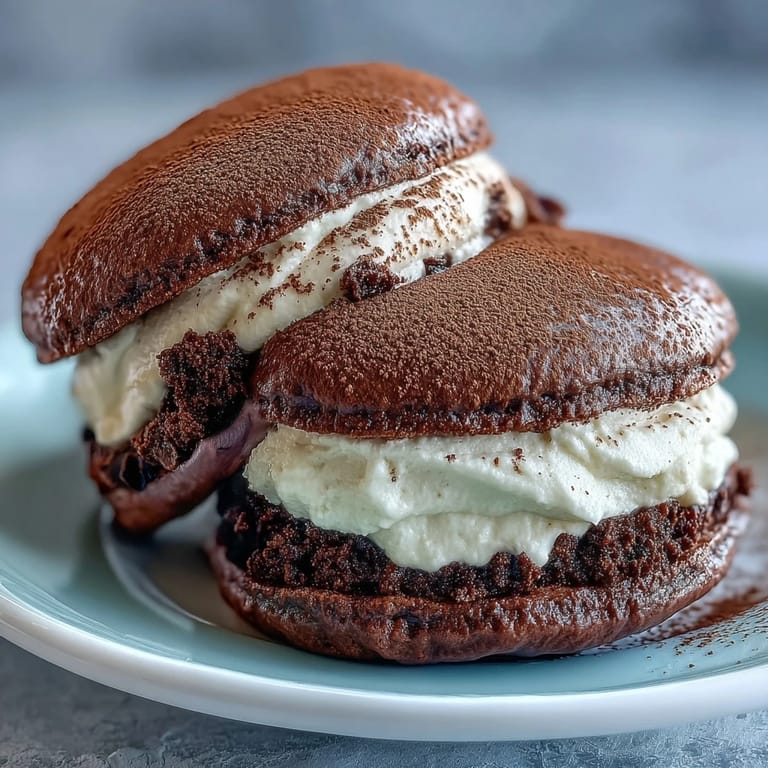 Save
Save The first time I brought these to a dinner party, someone said they tasted like a memory of Rome even though she'd never been. I think that's the magic of this recipe—it takes something familiar and beloved and makes it new again, small enough to hold in one hand but big enough to feel like a special occasion. Every time I dust the tops with cocoa, I think about how something this simple can feel so generous.
Making Ahead and Storing
You can bake the chocolate cakes a day in advance and store them in an airtight container at room temperature until you're ready to fill them. The mascarpone filling also holds up well in the fridge for a day, so you can prep both components separately and assemble them a few hours before serving. Once filled, the whoopie pies keep in the refrigerator for up to two days, though they're at their best within the first 24 hours when the cakes are still soft and the filling is perfectly creamy. If you want to serve them at a party, let them sit at room temperature for about 10 minutes before plating so the filling softens slightly and the flavors bloom.
Swaps and Variations
If you can't find mascarpone, you can substitute full-fat cream cheese, but beat it until it's very smooth and add an extra tablespoon of heavy cream to keep the filling light. For a boozy twist, stir a tablespoon of coffee liqueur or dark rum into the filling along with the espresso for a more grown-up flavor. You can also swap the instant espresso for strong brewed coffee, but reduce the amount to two teaspoons and let it cool completely before adding it to avoid thinning the filling. If you're not a coffee person, try replacing the espresso with a teaspoon of almond extract for a different but equally delicious take.
Serving Suggestions
These whoopie pies are stunning on a tiered stand at a brunch or afternoon tea, and they pair beautifully with a hot cappuccino or a glass of dessert wine. You can also serve them on individual plates with a small spoonful of whipped cream and a few chocolate shavings for a plated dessert that looks far more complicated than it is. They're perfect for gifting too—just stack them in a clear box tied with a ribbon, and you've got a homemade present that actually looks like you tried.
- Serve them chilled for the best texture, but let them sit out for 10 minutes if you want the filling to soften.
- Pair with a strong espresso or a latte to echo the coffee flavors in the filling.
- Garnish individual servings with a few chocolate-covered espresso beans for an elegant touch.
 Save
Save  Save
Save These little cakes have a way of turning an ordinary afternoon into something worth remembering. Make them once, and I promise they'll become the dessert you reach for when you want to impress without the stress.
Recipe Questions
- → Can I make these whoopie pies ahead of time?
Yes, you can bake the chocolate cookies up to 1 day in advance and store them in an airtight container. Assemble with the filling just before serving for best texture, or store fully assembled whoopie pies in the refrigerator for up to 2 days.
- → What can I substitute for mascarpone cheese?
Cream cheese can be substituted for mascarpone if unavailable, though the flavor and texture will be slightly different. Mascarpone is milder and creamier, while cream cheese has a tangier taste.
- → How do I prevent the filling from becoming too runny?
Make sure your mascarpone and heavy cream are well-chilled before beating. Avoid overbeating the filling, which can cause it to separate. If the filling seems too soft, refrigerate it for 20 minutes before assembling the whoopie pies.
- → Can I add alcohol to these whoopie pies?
Absolutely! Adding 1 tablespoon of coffee liqueur like Kahlúa to the mascarpone filling enhances the tiramisu flavor. This addition is optional and makes the dessert more suitable for adults.
- → Why are my chocolate cookies spreading too much during baking?
Ensure your butter is softened but not melted, and that you're not overmixing the batter. Also, make sure your baking powder and baking soda are fresh. Chilling the batter for 15 minutes before scooping can also help prevent excessive spreading.
- → How should I store leftover whoopie pies?
Store assembled whoopie pies in an airtight container in the refrigerator for up to 2 days. The mascarpone filling contains dairy and requires refrigeration. Bring to cool room temperature before serving for best flavor.